Using VSCode for Arduino Development
January 08, 2022
As a software developer learning Arduino and basic electronics, working in the Arduino IDE has left much to be desired.
Over my years of programming, I've developed a very comfortable development workflow. The specifics of that workflow can change depending on the nuance of what I'm building or the language I'm working with, but there are a few fundamentals that are very important to me:
- I want Vim keybindings
- I want to easily jump to symbol definitions (and jump back) with a button press
- I want inline feedback when I make a syntactical errors
- I want autocomplete and inline documentation for core language constructs (especially when writing in a language I'm unfamiliar with)
For people who don't know what they are missing, the Arduino IDE does a great job at providing a basic code editing experience.
However, for those of us who DO know what we're missing, there is a solution: dropping the Arduino IDE and switching to Visual Studio Code.
Installing Arduino dependencies
VSCode on its own isn't built to talk to Arduino hardware, so we'll need some external dependencies to compile code and upload to boards. Luckily, all of those dependencies are readily provided by Arduino themselves.
You have two options:
- Download the Arduino Desktop IDE
- Download the Arduino CLI
I'd only really recommend the former if you already have it downloaded; otherwise, I think the CLI provides a better experience for what we'll use it to do.
For installing the IDE, it's as simple as downloading the executable and following the steps in the installer.
For installing the CLI, you'll need to download a tar file from the GitHub releases page, uncompress it, and put the CLI executable in a directory in your $PATH.
Install one or the other, and you'll be ready to move on.
Installing the Arduino extension
Next, we'll need to install an extension in VSCode that does two things:
- provides language support when coding in Arduino (
*.ino) files - interfaces with the Arduino toolchain (via the IDE or the CLI) to compile our code and upload it to our board
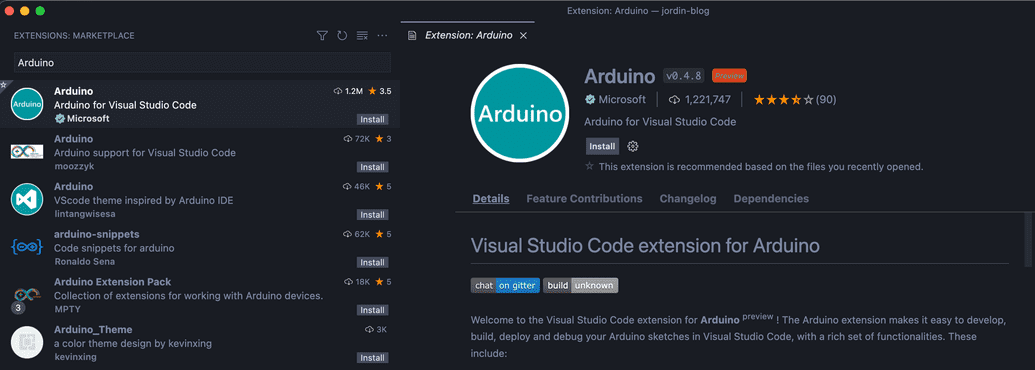
In an empty VSCode workspace, hit Command + Shift + X (Control instead of Command if on Windows or Linux) to open the Extensions panel. Once the panel is open, search for "Arduino":
Choose the first one on the list that is authored by Microsoft. After clicking Install, the extension will automatically be enabled.
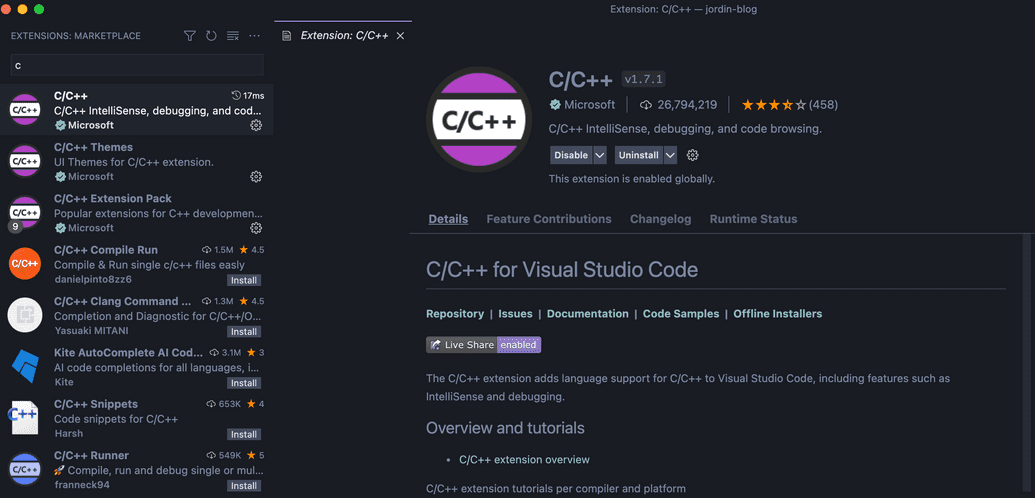
Repeat the same process with the C/C++ extension:
Configuring an Arduino workspace
Now, we'll initialize an Arduino file to test our setup with. In VSCode, open up the Command Palette with F1 and run the command Arduino: Initialize:
If you have any Arduino files in your VSCode workspace already, they should be listed in the output of this command. Otherwise, the extension will create a new file after we enter a file name; I'm going to name my file hello-world.ino:
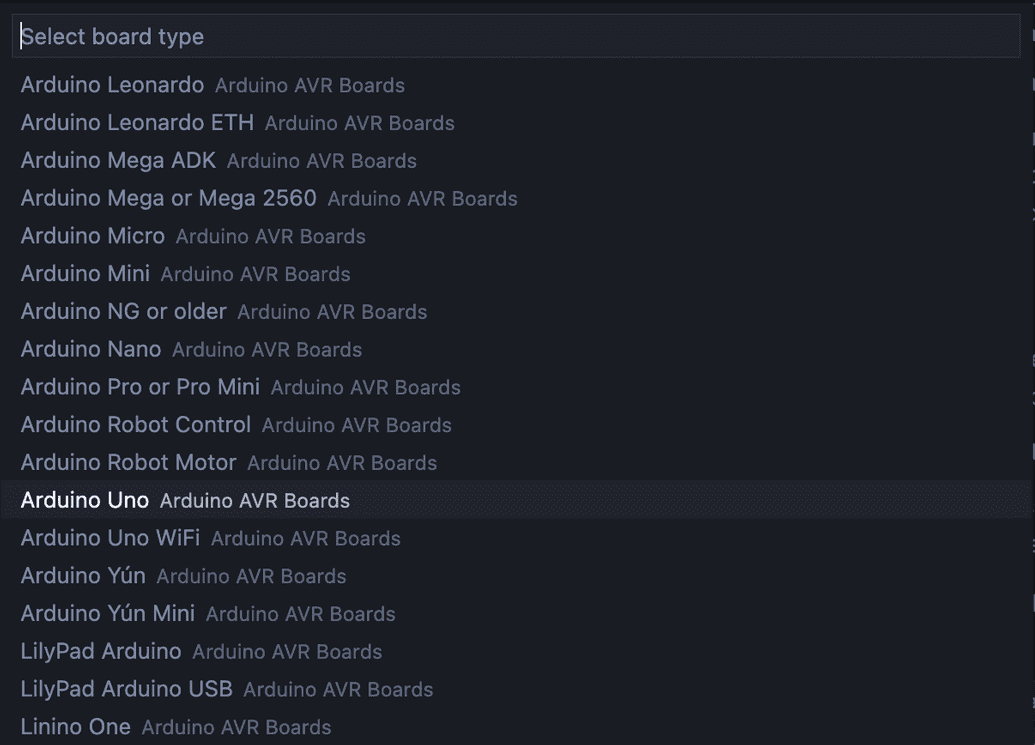
After hitting enter, you'll be prompted to select the type of board you'll be developing for. I'm using an Arduino Uno:
Once the board type is selected, you'll know that everything has worked if an Output panel pops up from the bottom of the screen indicating that your new sketch has been analyzed:
Notice that a new file was also generated at the path .vscode/arduino.json; the extension reads from this file to know how it should behave when we run extension commands.
Everything is now set up for us to start writing Arduino code. Let's do some final configuration to make sure we can talk to our board.
Setting up the serial port
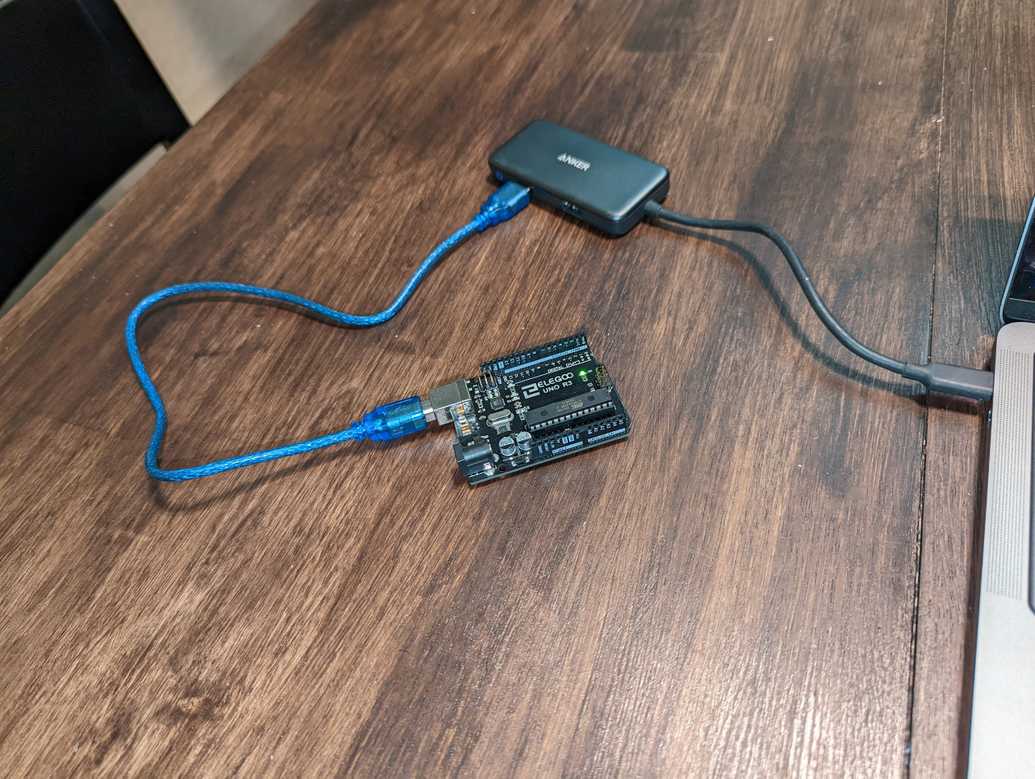
We need to tell the Arduino extension about the serial port it should use to communicate with our Arduino board. If you don't have your board plugged in already, plug it in now:
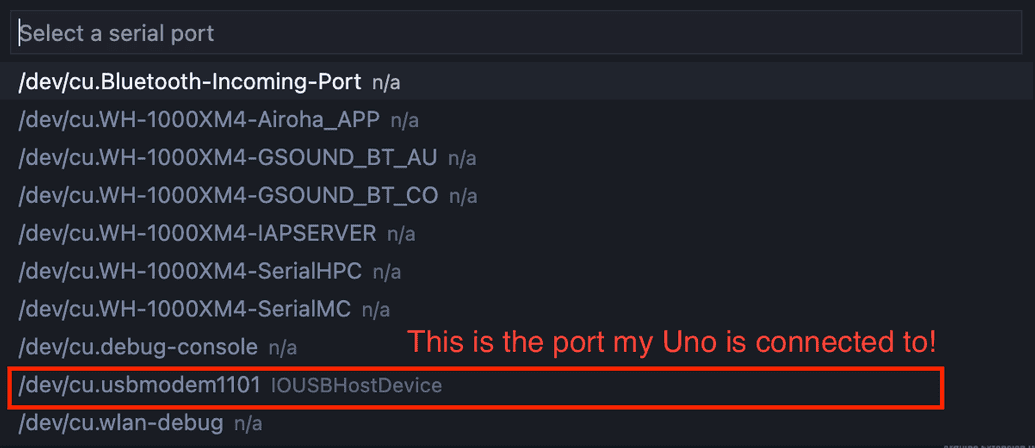
Hit F1 again and run the command Arduino: Select Serial Port:
From the list, you'll need to select the serial port that is associated with the USB port that your device is plugged into. If you're not sure which port to select from the list, there are two ways to double check:
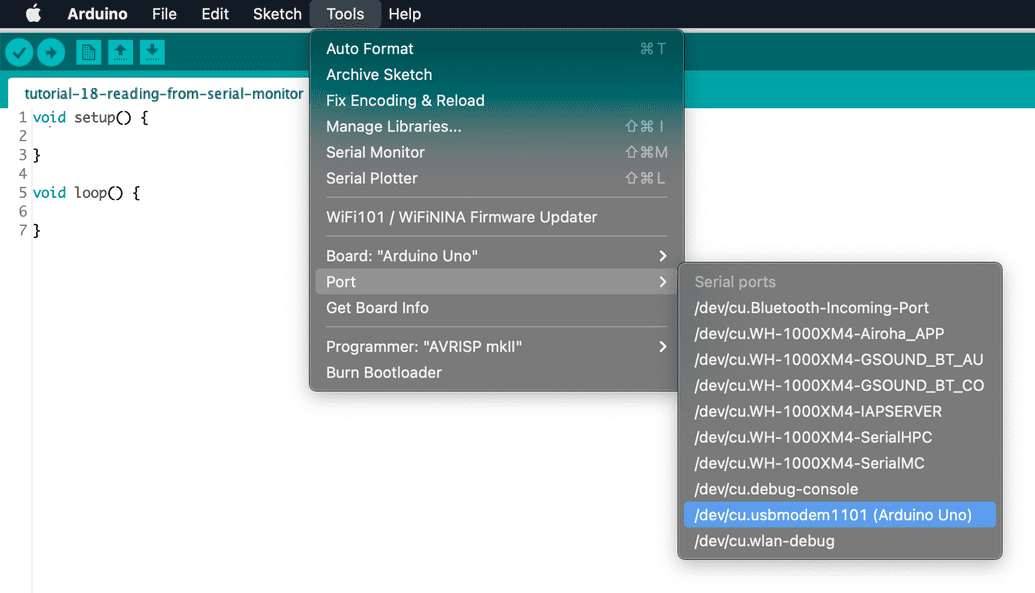
Option 1: The Arduino IDE
The Arduino IDE has some built-in smarts to cleverly detect serial ports that have Arduino devices connected to them. If you open up the Arduino IDE, then click Tools -> Port, you will probably see an entry in the list that has your device name in parentheses:
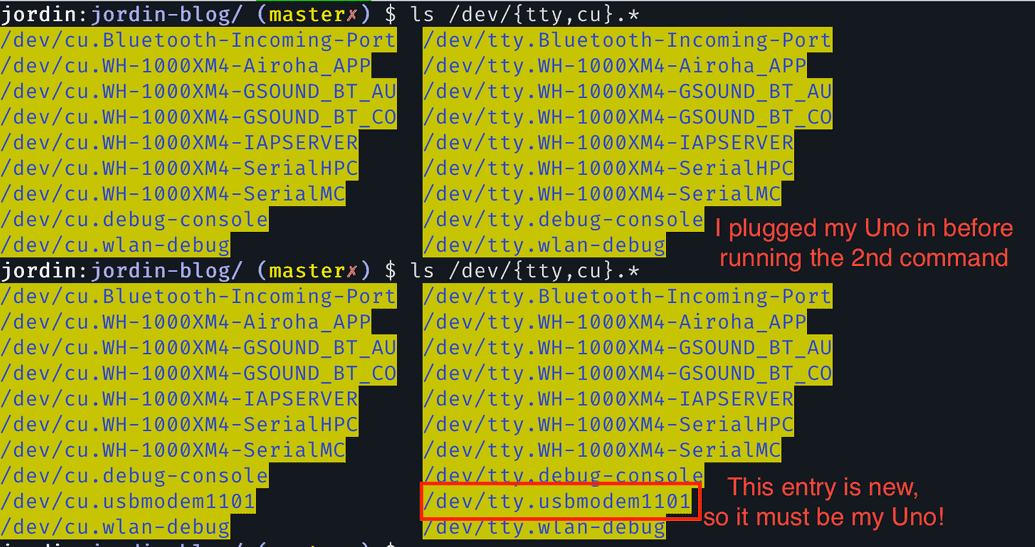
Option 2: The Command Line on Unix
If you're on a Unix-based machine (macOS or Linux), whenever new devices are connected to your computer, special files for them are created at the /dev path. You can use this in combination with ls to compare your serial ports before and after you plug your device in:
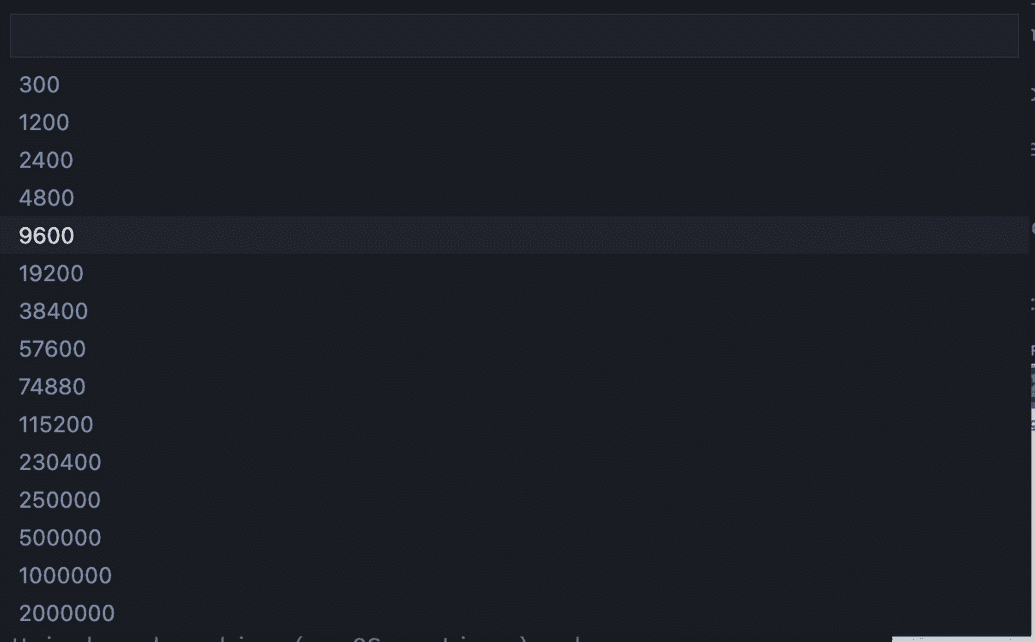
Setting up the baud rate
As the final step in our configuration, we just need to set the default baud rate that we'll use in our code. For reasons I don't fully understand (lol), I've been using 9600:
Running some code
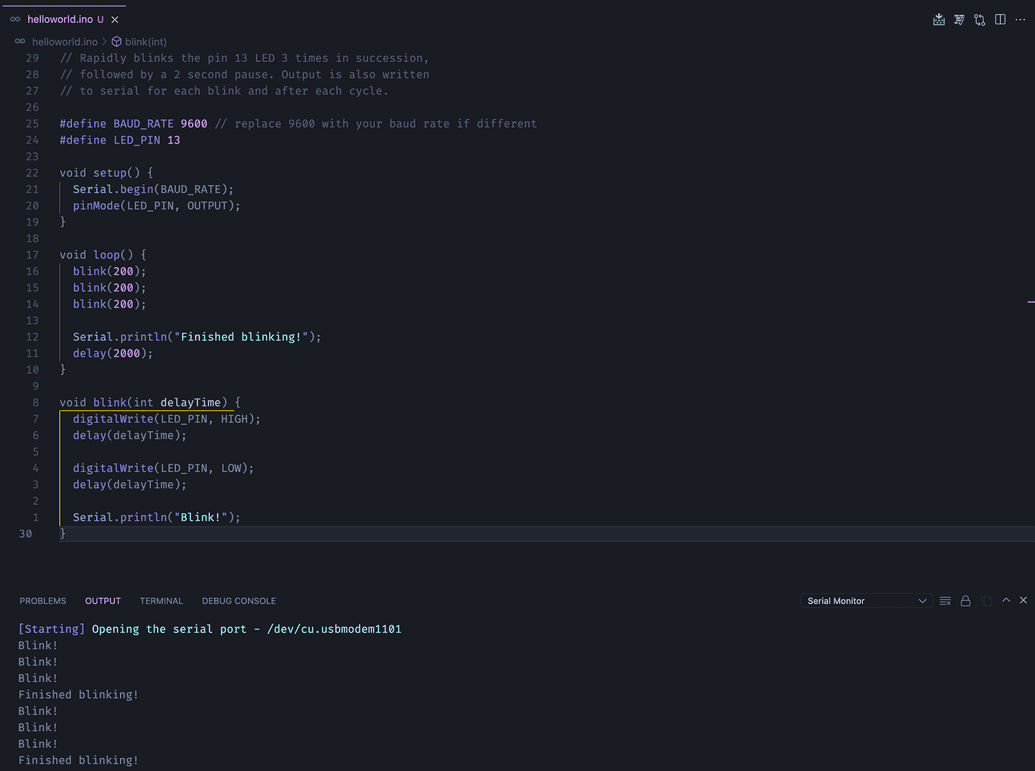
Finally, it's time to confirm that everything is setup correctly! Let's add some actual code to our file and upload it to our Arduino. Copy and paste the following into the helloworld.ino file:
// Rapidly blinks the pin 13 LED 3 times in succession,
// followed by a 2 second pause. Output is also written
// to serial for each blink and after each cycle.

#define BAUD_RATE 9600 // replace 9600 with your baud rate if different
#define LED_PIN 13

void setup() {
  Serial.begin(BAUD_RATE);
  pinMode(LED_PIN, OUTPUT);
}

void loop() {
  blink(200);
  blink(200);
  blink(200);

  Serial.println("Finished blinking!");
  delay(2000);
}

void blink(int delayTime) {
  digitalWrite(LED_PIN, HIGH);
  delay(delayTime);

  digitalWrite(LED_PIN, LOW);
  delay(delayTime);

  Serial.println("Blink!");
}
This code assumes that you're using an Uno or similar that has an in-built LED connected to port 13. If this is not the case for your device, you'll need to update the code accordingly so that you can adequately test the upload process (feel free to use a program of your own).
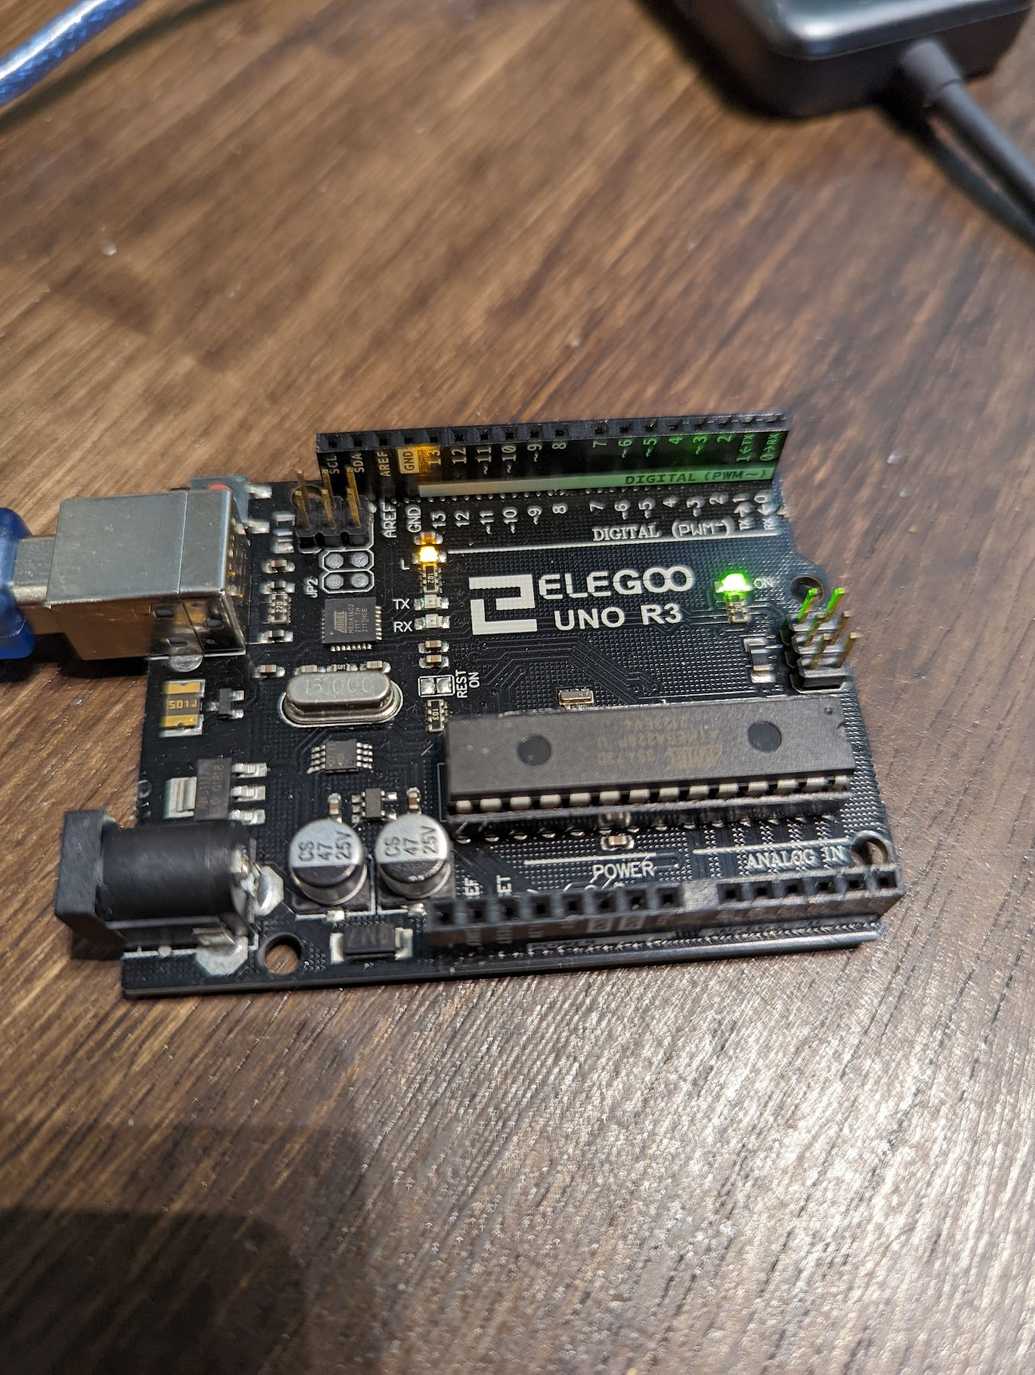
Hit F1 and run either of the Arduino: Upload or Arduino CLI: Upload commands according to whichever you have installed. You should get output showing that the code is being uploaded, and shortly thereafter the LED on your board should start blinking (3 times in succession with a longer delay in-between):
We can further confirm that our setup is working by opening up the Serial Monitor. Hit F1, run Arduino: Open Serial Monitor, and the Serial Monitor should pop open from the bottom of the screen. You should immediately start seeing output from your running program -- if not, try adjusting your baud rate to 9600 again by running Arduino: Change Baud Rate.
(Optional) Configure keyboard shortcuts
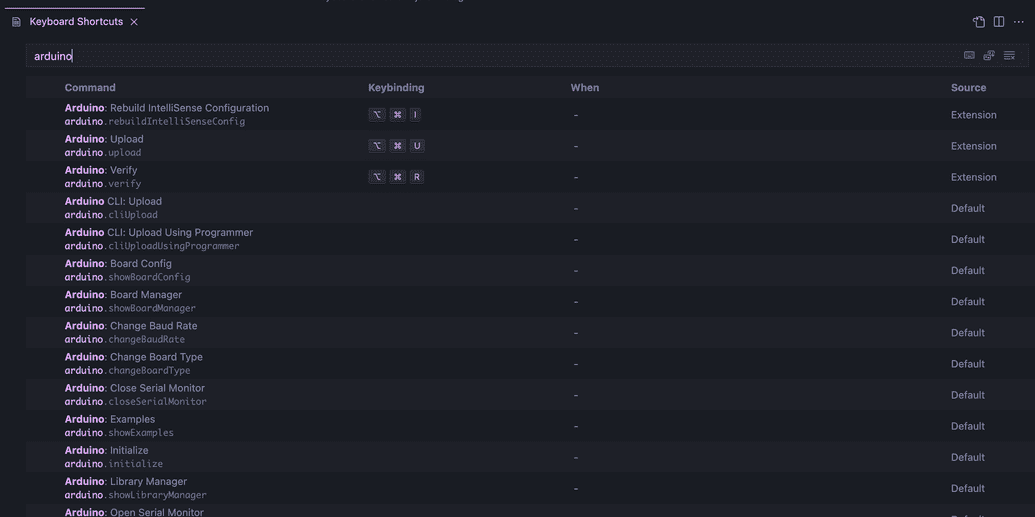
Now that everything is setup, you can easily configure keyboard shortcuts for all of the common Arduino-specific actions that you perform while working on sketches. Hit F1 and run the command Preferences: Open Keyboard Shortcuts, then type "arduino" to get a list of all of the Arduino actions you can map hotkeys for:
(Optional) Explore the Arduino source code
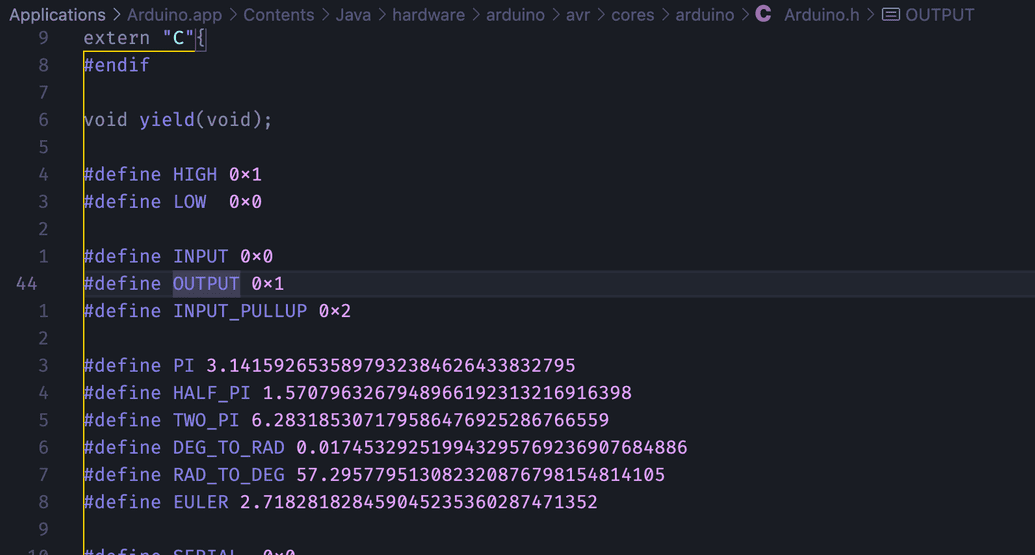
You can now leverage your new setup to garner a deeper understanding of what is happening underneath the hood with Arduino. For example, you've probably used constants HIGH and LOWwhen writing digital output to Arduino pins before; have you ever wondered how those constants are actually defined?
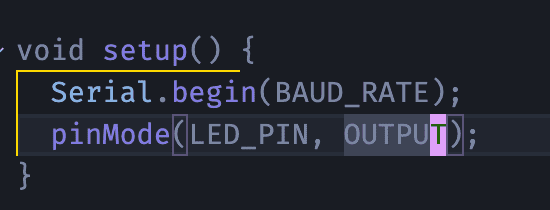
In the helloworld.ino, put your cursor over an instance of HIGH and hit F12 to jump to its definition:
You can do this with not just with built-in constants, but also methods, classes, and definitions from 3rd party libraries.
Wrapping Up
VSCode can now replace the Arduino IDE as your development environment for writing Arduino sketches. Now that I've made the leap, there's no going back -- I can write code for Arduino while still having all of the features I enjoy with day-to-day development.
If you run into any problems getting things set up or have feedback on how this tutorial could be clearer, hit me up at gard.jordin@gmail.com or DM me on 🐦 Twitter!

